I was standing in my kitchen last Tuesday, staring at a chipped, dated ceramic vase that had once been my pride and joy, feeling that familiar sting of “why did I spend so much money on this?” Most people will tell you that if you want a professional finish, you need to drop hundreds on high-end equipment or replace the item entirely, but that is a total myth. Learning how to spray paint isn’t about having the most expensive setup; it’s actually about mastering the rhythm and patience of the application. It’s a lot like tempering chocolate or perfecting a delicate reduction—if you rush the process, you end up with a sticky, uneven mess that’s impossible to fix.
In this guide, I’m stripping away the fluff to give you a realistic, budget-friendly roadmap to achieving those flawless, boutique-style results. We are going to dive into the essential prep work, the secret to avoiding those dreaded drips, and how to choose the right finish without draining your savings. Whether you’re refreshing old furniture or breathing new life into kitchen decor, I’ll show you how to turn a simple DIY project into a high-end masterpiece.
Table of Contents
- Step-by-Step Instructions
- The Secret to Professional Results Essential Spray Paint Surface Preparatio
- Finding the Best Spray Paint for Diy Projects and Creative Joy
- The Finishing Touches: My Pro-Tips for a Flawless Finish
- The Recipe for Success: My Top Three Takeaways
- The Art of the Transformation
- Finishing Touches and Fresh Starts
- Frequently Asked Questions
Guide Overview
Tools & Supplies
- Spray paint cans (the primary coating medium)
- Drop cloths (to protect surfaces from overspray)
- Sandpaper (to smooth surface before painting)
- Painter's tape (to mask off areas not being painted)
- Surface cleaner (1 bottle/can to remove dust and oil)
- Primer (1 can to ensure paint adhesion)
- Spray paint (1-3 cans depending on surface area)
Step-by-Step Instructions
- 1. First things first, you have to prep your workspace, and I mean really prep it. Think of this like setting up a professional kitchen before a big dinner service—if your station is messy, the whole dish suffers. Lay down some old newspapers or a heavy-duty drop cloth to protect your floors, and if you’re working indoors, make sure you have plenty of ventilation. You don’t want to be breathing in those fumes, so crack a window or head out to the garage to keep things safe and breezy.
- 2. Once your space is set, it’s time to clean your project. Whether it’s an old wooden chair or a metal lamp, any dust, grease, or old wax will act like a barrier between your paint and the surface. I like to use a bit of mild soap and water or even a degreaser to ensure the surface is spotless. If the surface is super smooth, a quick light sanding with fine-grit sandpaper will give the paint something to “grip” onto, much like how a good marinade needs a little help to penetrate a tough cut of meat.
- 3. Now, let’s talk about the “masking” phase. This is where you decide what stays the original color and what gets the makeover. Use high-quality painter’s tape to cover any areas you don’t want touched by the spray. I’ve learned the hard way that cheap tape can sometimes peel off your underlying finish, so invest in the good stuff. It’s a small upfront cost that saves you a massive headache (and a lot of extra scrubbing) later on.
- 4. Before you even think about pulling that trigger, give your spray can a good, vigorous shake. You’ll hear the little mixing ball rattling inside, which is a great sign that the pigments are getting well-blended. I always shake mine for at least a full minute; you want that mixture to be perfectly homogenous to avoid those annoying blotches or drips that can ruin your hard work.
- 5. When you’re ready to paint, the secret is all in the “light touch.” Hold the can about 8 to 12 inches away from your object and move in steady, even strokes. Instead of trying to cover everything in one heavy coat, aim for several thin, translucent layers. It might feel like you aren’t doing enough at first, but trust the process—layering is much more effective (and looks way more professional) than one thick, gloopy mess.
- 6. As you work, keep an eye on your drying times. It’s incredibly tempting to add a third coat immediately because you want to see the finished product, but patience is your best friend here. Let each layer dry until it’s no longer tacky to the touch. Think of it like letting a complex sauce simmer; if you rush the heat, you lose the depth and quality of the final result.
- 7. Finally, once everything is completely dry and you’ve removed your painter’s tape, give your piece a little inspection. If you notice any tiny imperfections, don’t panic! You can always add one more light misting or a clear topcoat to seal in the color and add a bit of shine. Taking that extra step to finish strong is what turns a DIY project into a true statement piece for your home.
The Secret to Professional Results Essential Spray Paint Surface Preparatio
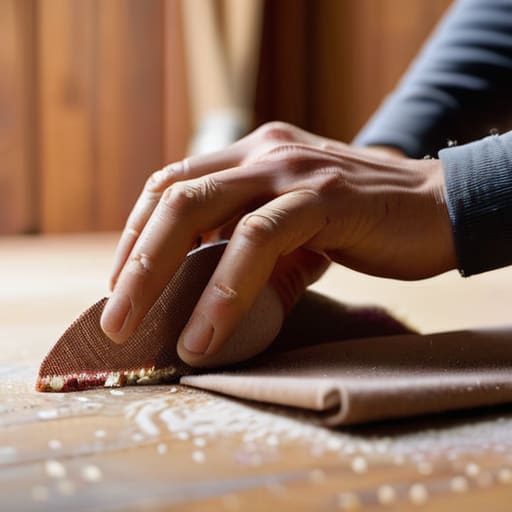
If there is one thing my years in financial analysis taught me, it’s that you can’t expect a high ROI if you skip the foundational work. The same goes for your DIY projects! I like to think of spray paint surface preparation as the mise en place of the crafting world. Just as you wouldn’t dream of starting a complex reduction without finely diced aromatics, you shouldn’t even touch a spray can until your surface is pristine. This means scrubbing away every bit of grease, dust, or old wax. If you skip this, you aren’t just risking a messy finish; you’re essentially throwing your investment down the drain.
Once your surface is clean and dry, don’t underestimate the power of a good primer for spray painting. In my kitchen, a good base layer of fat is essential for flavor, and in painting, a primer is what ensures your color actually sticks and looks professional. It acts as the bridge between your object and that beautiful new hue. Taking this extra twenty minutes now is the absolute best way to ensure you’re preventing drips and runs later on, saving you from the heartbreak of having to sand everything down and start all over again.
Finding the Best Spray Paint for Diy Projects and Creative Joy
Choosing the right supplies felt a lot like my transition from finance to food: it’s all about finding the quality ingredients that actually deliver on their promises. When you’re hunting for the best spray paint for DIY projects, don’t just grab the cheapest can on the shelf. In my experience, investing a little extra in a high-quality brand can be the difference between a finish that looks like a professional piece of decor and one that looks… well, amateur. I always look for paints with a high pigment load, which makes achieving those even coating techniques much easier and saves you from having to do five different layers.
Just like you wouldn’t throw unseasoned meat straight into a hot pan, you shouldn’t skip the foundational layers. I can’t stress enough how much a good primer for spray painting changes the game. It acts as the “base stock” of your project, ensuring the color sticks and looks vibrant. And please, don’t forget your spray painting safety equipment! Just as I wouldn’t dream of tasting a new fusion recipe without checking the ingredients for allergens, I never start a project without a reliable respirator and proper ventilation. Your lungs will thank you!
The Finishing Touches: My Pro-Tips for a Flawless Finish
- Master the art of the “light touch”—think of it like dusting a delicate pastry with powdered sugar rather than dumping a whole bag on. You want thin, sweeping coats to avoid those dreaded drips that can ruin your hard work.
- Don’t forget the “economic” side of your supplies: invest in a decent quality mask. Protecting your lungs is a non-negotiable expense, and trust me, your future self will thank you for not inhaling all those fumes while you’re in your creative zone.
- Watch your environment like a hawk. Just like you wouldn’t try to bake a soufflé in a drafty kitchen, don’t spray paint on a windy day or in high humidity. A calm, stable atmosphere is the secret ingredient to a smooth, even coat.
- Practice your “distance discipline.” If you hold the can too close, you get runs; too far, and the finish looks grainy and textured. I like to find that sweet spot—about 8 to 12 inches away—and stick to it like a well-rehearsed recipe.
- Patience is your greatest asset here. It’s so tempting to touch your project once it looks “dry,” but if you don’t let it cure properly, you’ll end up with fingerprints in your finish. Give it time to settle, just like letting a complex sauce simmer to perfection.
The Recipe for Success: My Top Three Takeaways
Treat your prep work like a slow-simmered reduction—it might take more time upfront, but it’s the only way to ensure your final “dish” doesn’t end up a sticky, uneven mess.
Don’t skimp on the quality of your ingredients; investing in a high-quality spray paint might feel like a bigger expense today, but it saves you a massive headache (and more money) in the long run by preventing costly re-dos.
Embrace the trial and error of the process, because just like perfecting a fusion recipe, your first attempt at a new technique is just a stepping stone toward mastering your craft.
The Art of the Transformation
“Think of spray painting like seasoning a complex dish; it’s not just about the initial splash of color, but about the patience you put into the preparation and the steady, intentional layers that turn something ordinary into a masterpiece you’re proud to display.”
Rachel Anderson
Finishing Touches and Fresh Starts
As we wrap up this project, I want you to take a second to look at what you’ve actually accomplished. We’ve covered everything from the meticulous prep work that prevents those frustrating drips to the art of choosing the right pigment for your vision. Just like when I was analyzing market trends or perfecting a complex reduction in the kitchen, the magic is always in the details. Remember, the secret to a professional finish isn’t just about having the most expensive cans of paint; it’s about the patience you invest in the layering process and the care you take in prepping your surfaces. If you’ve followed these steps, you aren’t just looking at a spray-painted object—you’re looking at a piece of art that you brought to life with your own two hands.
Ultimately, I hope this project serves as a small reminder that you have the power to transform your surroundings. Whether you’re refreshing an old piece of furniture to save a few bucks or experimenting with bold colors to spark some creative joy, you are practicing the art of intentional living. Transitioning from the rigid world of finance to the unpredictable world of food taught me that the best things in life often require a bit of a mess and a lot of courage. Don’t be afraid to make a mistake or end up with a slightly uneven coat on your first try. The goal is to embrace the process and find fulfillment in the doing. Now, go out there, get a little messy, and create something beautiful!
Frequently Asked Questions
How do I know if I'm using too much or too little paint without making it look blotchy?
Think of it like tempering chocolate or seasoning a delicate sauce—it’s all about the layers. If you see “runs” or drips, you’ve definitely overdone it; that’s your sign to back off and let it dry. If the original color is still peeking through heavily, you’re being too timid. Aim for a light, misty veil. You want to build coverage slowly through multiple thin coats rather than one heavy, gloopy layer.
Is it actually worth investing in a more expensive brand of spray paint, or can I get away with the budget options from the hardware store?
It’s the classic “quality vs. cost” dilemma I used to obsess over in my finance days! Honestly, it depends on your goal. If you’re just refreshing a terracotta pot, the budget hardware store option is totally fine. But if you’re tackling a centerpiece—like a vintage lamp or a piece of furniture—invest in the premium stuff. The better pigment and smoother nozzle mean less frustration and a finish that actually looks professional, not patchy.
What's the best way to deal with those annoying drips or runs if I accidentally apply too much in one spot?
Oh, we’ve all been there! It’s like accidentally over-salting a delicate sauce—suddenly, everything feels ruined. Take a deep breath; it’s fixable. If the paint is still wet, gently dab it with a soft cloth. If it’s already dried, don’t panic. Just grab some fine-grit sandpaper and lightly sand the drip until it’s flush with the surface. Once it’s smooth, apply a very thin, even layer to blend it back in. You’ve got this!
