I was standing in my new studio last month, surrounded by half-unpacked crates of vintage cookbooks and heavy copper pans, staring at a single, beautiful landscape print that refused to stay level. I had spent years analyzing market trends and managing complex spreadsheets, but suddenly, figuring out how to hang a picture felt like the most high-stakes financial audit of my life. There I was, sweating over a hammer and a crooked spirit level, realizing that even with a background in economics, creating a sense of home requires a completely different kind of precision.
If you’ve ever felt that same paralyzing frustration—or if you’re tired of staring at blank, soul-less walls because you’re afraid of making a permanent mistake—I’ve got you. I’m stripping away the DIY intimidation and giving you my no-nonsense, practical blueprint for getting it right the first time. We are going to cover everything from choosing the right hardware to finding that perfect eye-level sweet spot, ensuring your space feels as curated and intentional as a well-balanced investment portfolio. Let’s turn those empty walls into something that truly tells your story.
Table of Contents
- Step-by-Step Instructions
- Measuring for Picture Placement to Perfect Your Space
- A Picture Hanging Hardware Guide for Every Budget
- The Finishing Touches: My Pro-Tips for a Gallery That Feels Like Home
- Making Your House Feel Like Home
- Making a House Feel Like Home
- Final Touches and Fresh Perspectives
- Frequently Asked Questions
Guide Overview
Tools & Supplies
- Hammer for driving nails or hooks
- Pencil for marking placement
- Tape measure for spacing and height
- Level to ensure straightness
- Picture hanging hardware (nails or hooks) 1 pack
- Picture frame 1 unit
- Wall anchors (if using drywall without studs) 1 small pack
Step-by-Step Instructions
- 1. First, grab your artwork and find the exact spot where you want it to live. I know it’s tempting to just grab a hammer and start swinging, but think of this like planning a budget—you need a clear vision before you commit your resources. Hold the piece up against the wall, stepping back frequently to see how it interacts with your furniture and the light in the room.
- 2. Once you’ve found “the one” spot, grab a pencil and mark the center point of where the piece will sit. If you’re working with a heavy frame, this is where you have to be strategic about weight distribution. You don’t want a beautiful piece of art sliding down the wall three weeks later because you didn’t account for its heft.
- 3. Next, identify the hanging hardware on the back of your frame. Is it a wire, a sawtooth hanger, or a D-ring? This is the most crucial part of the technical setup. If it’s a wire, pull it taut toward the top of the frame so you can measure exactly how far it sits below the top edge; this measurement tells you exactly where your nail needs to go.
- 4. Now, it’s time for the precision work. Use a level to ensure your marks are straight—nothing kills the vibe of a cozy room faster than a crooked landscape. I like to think of this as the quality control phase of my culinary prep; if the foundation isn’t level, the whole dish (or in this case, the room) feels off.
- 5. Carefully drive your nail or screw into your marked spot. If you’re dealing with drywall, a simple nail might do, but for those heavier, more substantial pieces, I highly recommend investing in a drywall anchor. It’s a small upfront cost that provides the long-term security your home deserves.
- 6. Gently hang your piece and, once it’s settled, check it one last time with your level. Give it a tiny, affectionate nudge to make sure it’s seated firmly. Now, take a deep breath and enjoy the view—you’ve just turned a blank space into a curated sanctuary that actually feels like you.
Measuring for Picture Placement to Perfect Your Space
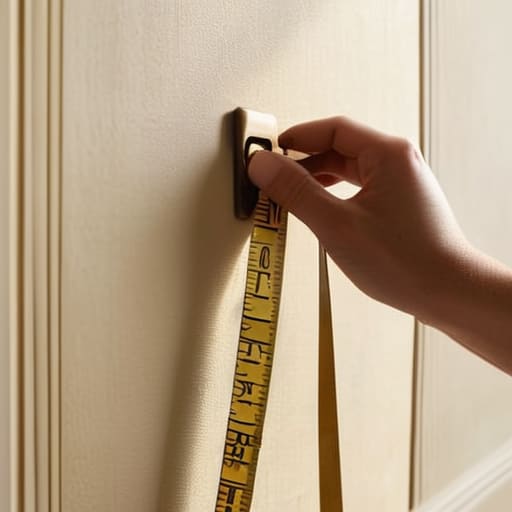
Before you even touch a hammer, I want you to think about the “flow” of the room. Back when I was analyzing market trends, it was all about finding the right equilibrium, and decorating is no different. When you’re measuring for picture placement, don’t just aim for the center of the wall; aim for the center of the experience. If you’re hanging art above a sofa or a dining table, you want the piece to feel anchored to the furniture, not floating aimlessly in space. A good rule of thumb I swear by is keeping the center of the frame at eye level—roughly 57 to 60 inches from the floor.
If you’re planning something more ambitious, like a collection of vintage culinary prints, you might want to look into some gallery wall layout ideas first. I always suggest laying everything out on the floor exactly how you want it before making a single hole. This saves so much mental energy! Also, if you’re dealing with those gorgeous, oversized pieces, please don’t skimp on the prep; knowing the difference between command strips vs nails can be the difference between a beautiful display and a midnight cleanup of broken glass.
A Picture Hanging Hardware Guide for Every Budget
When I first started transitioning from my desk job to my kitchen, I realized that just like a complex recipe, the success of your decor depends entirely on the quality of your ingredients. In this case, your “ingredients” are the tools you choose. If you’re working with lightweight prints or small snapshots, you don’t need to break the bank; honestly, the debate of command strips vs nails usually settles itself once you realize how much easier adhesive strips are for renters or those who want a damage-free life. They are perfect for those quick updates when you’re feeling a burst of creative energy.
However, if you’re trying to display a heavy, vintage brass-framed mirror or a substantial piece of art I might have found at a flea market, you have to play it safe. For hanging heavy frames on drywall, I always recommend investing in a few sturdy screw-in anchors. It’s a tiny upfront cost that prevents the heartbreak of a shattered frame on your floor. Think of it as an insurance policy for your aesthetic—a little bit of preparation ensures your sanctuary stays beautiful and, more importantly, completely intact.
The Finishing Touches: My Pro-Tips for a Gallery That Feels Like Home
- Trust your gut over the level. While I love a good measuring tape (old habits die hard!), sometimes a piece just “feels” right a little higher or lower than the math suggests. If it speaks to you, hang it there.
- Think about the “eye-level” rule, but make it personal. Standard advice says 57 inches, but if you’re hanging art above a low mid-century sideboard or a high dining table, let the furniture dictate the height so the room feels cohesive.
- Don’t forget the lighting—it’s the secret ingredient. Just like how a splash of acid brightens a heavy stew, a well-placed spotlight or even just natural light from a nearby window can make a simple print look like a museum masterpiece.
- Use painter’s tape to map out your vision. Before you even touch a hammer, tape the dimensions of the frame onto your wall. It’s a zero-risk way to see if the scale works with your space without leaving any accidental holes.
- Create a “story” rather than a grid. Instead of hanging everything in a stiff, perfect line, try grouping pieces with different textures and sizes. It mimics the beautiful, delicious chaos of a well-lived life (and a well-stocked kitchen!).
Making Your House Feel Like Home
Remember that there’s no “perfect” rulebook—trust your gut and hang your art where it brings you joy, not just where a measuring tape says it should go.
Treat your home decor like a well-balanced recipe; a little bit of intentionality with your hardware and placement goes a long way in creating a soulful, inviting space.
Don’t sweat the small stuff or the cost—whether you’re using a budget-friendly nail or a high-end mounting system, the goal is to create a sanctuary that reflects the life you love.
Making a House Feel Like Home
“Just like finding the perfect balance between a risky investment and a stable savings account, hanging art is all about finding that sweet spot where precision meets soul—don’t just fill a blank space, curate a moment that tells your story.”
Rachel Anderson
Final Touches and Fresh Perspectives
At the end of the day, hanging a picture is about much more than just driving a nail into a stud; it’s about the careful dance between precision and intuition. We’ve covered everything from the technical side of measuring your eye level to choosing the right hardware that won’t break your budget. Whether you’re using a simple hook for a lightweight print or investing in heavy-duty anchors for a vintage heirloom, the goal is to ensure your walls are both secure and stylish. Remember, it’s okay to step back, grab a cup of coffee, and look at your progress from across the room to make sure everything feels just right.
Transitioning from the rigid, predictable world of spreadsheets to the beautiful chaos of a kitchen—or a living room—taught me that perfection is often overrated. Sometimes, the most soulful spaces are the ones that feel lived-in and slightly imperfect. Don’t let the fear of a tiny hole in the drywall stop you from expressing your personality. Just like balancing a complex recipe or a career pivot, decorating your home is a journey of calculated risks and creative rewards. So, grab that hammer, trust your gut, and turn those blank walls into a reflection of the vibrant life you’re building.
Frequently Asked Questions
How do I hang heavy frames or large mirrors without worrying about them damaging my drywall or falling down?
I totally get the anxiety—there’s nothing worse than the thought of a heavy mirror crashing down or leaving giant holes in your drywall! When you’re dealing with something substantial, skip the tiny nails and go straight for wall anchors or, better yet, find a stud. If you can’t hit a stud, use heavy-duty picture hangers rated for the specific weight. Think of it like a recipe: getting the foundation right ensures everything else stays beautiful and secure.
I’m working with a rental—are there any damage-free ways to display my favorite art without losing my security deposit?
Living in a rental can feel like you’re walking on eggshells, especially when it comes to your security deposit. I totally get it—I used to obsess over every line item in my old lease! For damage-free decorating, I’m a huge fan of Command strips; just be sure to follow the weight instructions to the letter. You can also try leaning large frames against the wall or using tension rods. It’s all about style without the stress!
How do I arrange a group of different-sized pictures so they look like a cohesive gallery wall rather than just a random collection?
Think of a gallery wall like a complex fusion recipe—it’s all about finding the right balance between different “flavors.” To avoid that cluttered, random look, start by picking a common thread, like matching frames or a consistent color palette. I like to lay everything out on the floor first to play with the composition. Aim for a central anchor piece and build outward, keeping the spacing between frames relatively consistent to create a sense of intentional rhythm.
