I was standing in my kitchen last Tuesday, staring at a hairline crack between my backsplash and the countertop, feeling that familiar pang of dread. It looked like a tiny imperfection, but I knew it was a gateway for water—and eventually, a very expensive headache. Most people think that learning how to caulk requires a professional contractor or a specialized degree in engineering, but honestly? That’s just a myth that keeps us from taking ownership of our own spaces. Much like perfecting a delicate reduction sauce in a busy kitchen, it isn’t about having the most expensive tools; it’s about patience and the right technique.
In this guide, I’m stripping away the intimidation factor and giving you the straight talk on how to get a professional-grade finish without the professional price tag. We’re going to walk through everything from choosing the right sealant to that final, satisfying smoothing stroke that makes everything look seamless. I promise to share my no-nonsense, practical approach to mastering this skill so you can protect your home and enjoy that sense of order and peace that comes with a job well done.
Table of Contents
- Step-by-Step Instructions
- Choosing Your Ingredients Silicone vs Acrylic Caulk for Success
- The Perfect Finish Removing Old Caulk and Smoothing Caulk Beads
- Pro-Tips from the Kitchen (and the Toolbox): Mastering the Details
- The Secret Sauce to a Long-Lasting Seal
- The Beauty in the Details
- The Final Polish: Why the Little Things Matter
- Frequently Asked Questions
Guide Overview
Tools & Supplies
- Caulking gun to apply the sealant
- Putty knife or scraper to remove old caulk
- Caulk finishing tool or wet finger to smooth the bead
- Caulk tube (silicone or acrylic) 1-2 tubes
- Caulk remover or chemical stripper if replacing old sealant
- Rubbing alcohol or cleaner to prep the surface
Step-by-Step Instructions
- 1. Before you even touch the caulk gun, you have to prep your workspace—think of this as the mise en place of home repair. Use a putty knife or a small screwdriver to gently scrape away every last bit of the old, crusty caulk from the gap. If you don’t get a clean surface, your new layer won’t bond, and you’ll be back at square one before you even start.
- 2. Once the old residue is gone, grab a vacuum or a damp cloth to clear out any dust or debris. I’ve learned the hard way that even a tiny speck of dust can act like a barrier, preventing that seamless connection we’re all striving for. You want that gap to be as clean as a freshly wiped marble countertop.
- 3. Now, let’s talk about the caulk itself. Cut the tip of your tube at a slight angle—not too big, not too small. If you cut it too wide, you’ll end up with a messy, unmanageable blob, which is a total budget-killer when you have to buy more supplies to fix your mistakes. Aim for a small opening that matches the width of the gap you’re filling.
- 4. Hold your caulk gun at a steady 45-degree angle and apply consistent pressure as you move along the seam. It’s a lot like drizzling a balsamic reduction over a dish; you want a steady, controlled flow rather than a frantic squeeze. Try to keep your movement smooth and continuous to avoid those awkward bumps that are a pain to smooth out later.
- 5. While the caulk is still wet, it’s time for the smoothing phase. I like to use a finger dipped in a little bit of soapy water to lightly run along the bead. This helps create that perfectly professional finish and pushes the caulk deep into the crevice where it needs to be. Just don’t overdo it, or you’ll end up pulling too much material out of the gap.
- 6. Finally, resist the urge to touch it! Just like letting a sourdough starter rest or a complex sauce simmer, caulk needs its undisturbed time to cure properly. Check the tube for the recommended drying time, and try to keep the area dry for at least 24 hours to ensure your hard work stays intact and looks beautiful.
Choosing Your Ingredients Silicone vs Acrylic Caulk for Success
Think of choosing your caulk like selecting the base for a complex sauce; the wrong foundation can ruin the entire dish, no matter how much effort you put into the execution. When you’re deciding between silicone vs acrylic caulk, you’re essentially weighing flexibility against ease of use. Silicone is your heavy-duty powerhouse—it’s waterproof and incredibly resilient, making it the absolute best caulk for windows and high-moisture areas. However, it can be a bit finicky to work with if you aren’t used to it.
On the other hand, acrylic caulk is much more forgiving, almost like a light vinaigrette. It’s easier to paint over and much simpler when you’re first learning the ropes of smoothing caulk bead to get that clean, professional look. Just keep in mind that it isn’t quite as water-resistant as silicone, so I wouldn’t recommend it for heavy-duty jobs like caulking bathroom seams where constant splashing occurs. Before you dive in, though, make sure you’ve done the prep work by removing old caulk entirely. You wouldn’t layer a new reduction over a burnt sauce, right? Start with a clean slate for the best results.
The Perfect Finish Removing Old Caulk and Smoothing Caulk Beads
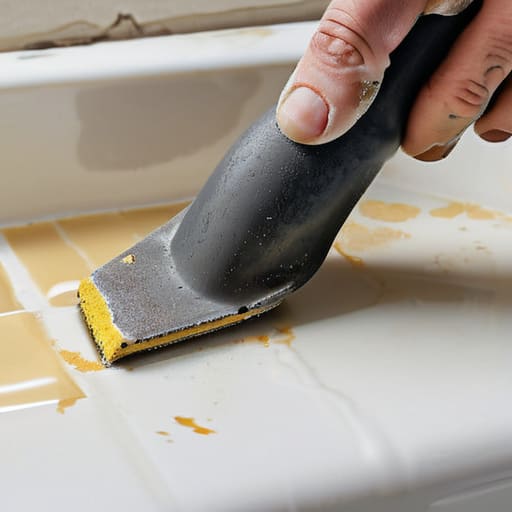
Before you even think about reaching for that fresh tube, you have to deal with the “leftovers.” Trust me, I know from experience—trying to layer new material over the old is like trying to plate a beautiful fusion dish on a dirty saucer. It just won’t work. Removing old caulk is the most tedious part of the process, but it’s non-negotiable for a professional result. Grab a putty knife or a specialized scraper and take your time peeling away those crusty, discolored bits. If you’re tackling something stubborn like caulking bathroom seams, you might even want to use a hairdryer to slightly soften the material. It’s all about creating a clean slate before you begin.
Once your new bead is laid down, the real magic happens during the smoothing stage. This is where your patience pays off. I like to think of smoothing a caulk bead much like tempering chocolate; you need a steady hand and a gentle touch to get that flawless, seamless look. Dip your finger in a bit of soapy water—it prevents the material from sticking to your skin—and lightly glide it along the line. It’s incredibly satisfying to see that messy line transform into a perfectly uniform seal.
Pro-Tips from the Kitchen (and the Toolbox): Mastering the Details
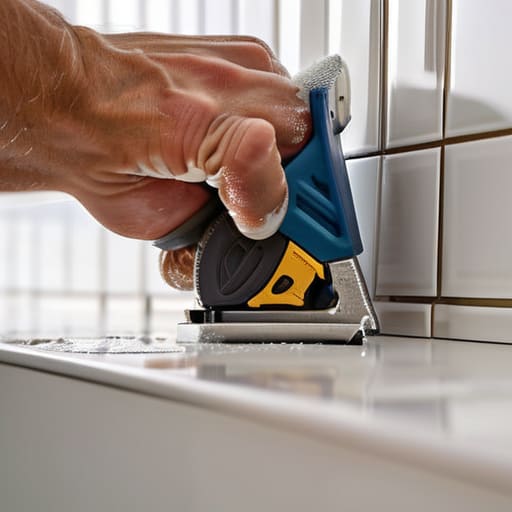
- Prep is your mise en place. Just like you wouldn’t start a complex risotto without having your onions diced and broth warmed, you shouldn’t touch a caulk gun until your surface is bone-dry and completely free of old residue. A clean surface is the secret to a bond that actually lasts.
- Don’t be afraid to go slow. In my old finance days, rushing a spreadsheet meant a massive error down the line; in DIY, rushing a bead means a messy gap. Apply the caulk in steady, controlled movements—think of it like drizzling a reduction sauce over a plate.
- Use the “wet finger” trick, but keep it hygienic. To get that professional, smooth finish, dip your finger in a little bit of soapy water before smoothing the bead. It prevents the caulk from sticking to your skin and gives you much more control over the shape.
- Watch your angles. If you hold the nozzle at a weird tilt, you’re going to end up with an uneven application that looks amateur. Aim for a consistent 45-degree angle to ensure the material is pushed deep into the crevice rather than just sitting on top of it.
- Manage your expectations and your budget. Sometimes, the “quick fix” costs more in the long run because you have to buy more supplies to redo it. Invest in a decent caulk gun—the cheap ones can be a nightmare to squeeze—and you’ll find the whole process much more satisfying and less of a chore.
The Secret Sauce to a Long-Lasting Seal
Treat your preparation like mise en place; taking the extra time to scrape away old residue and clean the surface is the only way to ensure your new caulk actually sticks and performs.
Match your “ingredients” to the job at hand, just like choosing the right spice for a dish—use silicone for wet, high-moisture areas like tubs, and stick to acrylic for more forgiving, paintable surfaces.
Don’t rush the finish; a smooth, steady bead might feel intimidating at first, but practicing your technique is just like mastering a new recipe—it takes a little patience and a light touch to get it perfect.
The Beauty in the Details
“I’ve learned that whether you’re perfecting a delicate reduction sauce or sealing a gap in your kitchen backsplash, the magic is all in the patience. It’s about giving yourself the grace to slow down and realize that those small, meticulous details are exactly what turn a house into a home, and a job into a craft.”
Rachel Anderson
The Final Polish: Why the Little Things Matter
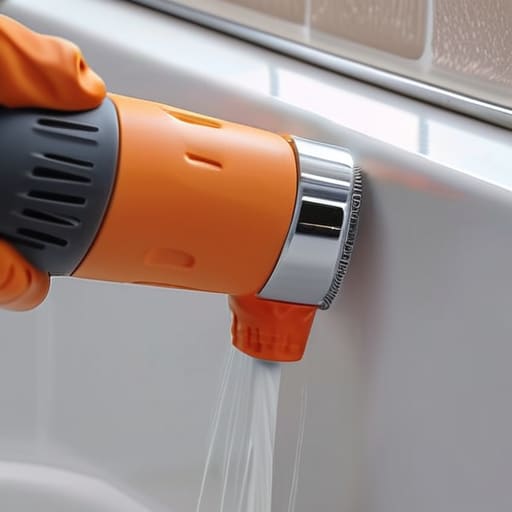
At the end of the day, mastering the art of caulking is all about the details. We’ve walked through the essential steps, from selecting the right “ingredients”—whether that’s the flexible durability of silicone or the paintable ease of acrylic—to the meticulous process of clearing out the old and smoothing out those new beads. It might seem like a small, messy task, but much like prepping a complex reduction sauce in the kitchen, the prep work and precision you put in now determine the quality of the final result. Taking that extra moment to ensure a clean, watertight seal isn’t just about home maintenance; it’s about investing in the longevity of your space so you can focus on what really matters.
Transitioning from the rigid, predictable world of financial spreadsheets to the unpredictable heat of a professional kitchen taught me that growth often happens in the messy middle. Sometimes, the most rewarding projects are the ones that require a bit of patience and a willingness to get your hands dirty. Whether you are sealing a bathroom tile or finally pivoting toward that dream career, remember that consistency and care are your greatest assets. Don’t let the fear of a little imperfection stop you from starting. Embrace the process, enjoy the satisfaction of a job well done, and keep building a life that is as beautiful as it is secure.
Frequently Asked Questions
How do I know if I'm dealing with a simple cosmetic issue or a bigger structural problem that needs a professional?
Think of it like tasting a sauce: sometimes it just needs a pinch of salt, but other times the whole base is broken. If the caulk is just peeling or discolored, it’s a quick cosmetic fix. But if you see deep cracks in the drywall or notice water pooling behind the tiles, that’s a red flag. Don’t risk your “kitchen equity”—if the structure feels compromised, call a pro before a small leak becomes a massive expense.
Is there a way to fix a messy caulk line without having to strip everything back and start from scratch?
Honestly, I’ve been there—standing over a kitchen sink feeling like I’ve just ruined a perfect recipe. If it’s just a minor smudge, don’t panic! You can often “rescue” a bead by lightly wetting your finger with soapy water and gently smoothing the excess. However, if it’s a real mess, it’s better to spend the extra twenty minutes stripping it now. Think of it like correcting a sauce; a quick fix might look okay, but doing it right ensures long-term stability.
How long should I actually wait before getting it wet or using the shower again?
This is the part where my inner financial analyst wants to play it safe, but my inner chef knows that rushing the process ruins the result! While some caulks claim to be “water-ready” in an hour, I always recommend waiting at least 24 hours before hitting the shower. Think of it like letting a complex reduction simmer; patience ensures a perfect, waterproof seal that won’t crack when things get steamy.
