I was standing in my backyard last summer, staring at a pile of expensive, pre-assembled cedar kits that had arrived looking nothing like the glossy photos online, wondering why I hadn’t just applied my analytical brain to this project sooner. We’ve been told that learning how to build a raised garden bed has to be this massive, intimidating undertaking that requires a professional contractor and a massive budget, but that is a total myth. In reality, if you can manage a spreadsheet or follow a basic recipe, you can master this. I realized that the secret isn’t in the complexity of the tools, but in the strategic planning of your materials—something my old life in finance actually prepared me for in the most unexpected way.
In this guide, I’m stripping away the fluff to give you a no-nonsense, practical roadmap to building your own garden sanctuary. I’ll walk you through everything from selecting the right rot-resistant wood to calculating the exact volume of soil you’ll need, ensuring you don’t waste a single cent on unnecessary supplies. My goal is to help you create a space that fuels your culinary creativity and brings a sense of tangible accomplishment to your daily routine. Let’s get growing!
Table of Contents
- Step-by-Step Instructions
- Choosing the Best Wood for Raised Beds and Long Term Joy
- Perfecting Dimensions and Soil Mixes for a Life Well Fed
- Small Tweaks for Big Returns: My Pro-Tips for Garden Success
- Cultivating Your Success: Final Thoughts for Your Garden Journey
- Investing in Your Own Harvest
- Cultivating Your Own Patch of Paradise
- Frequently Asked Questions
Guide Overview
Tools & Supplies
- Measuring tape for marking wood lengths
- Drill with bits for assembly
- Saw for cutting boards to size
- Level to ensure even ground
- Untreated cedar or redwood boards (approx. 4-6 pieces)
- Wood screws (1 box of exterior grade)
- Garden soil/compost mix (enough to fill volume)
- Hardware cloth or landscape fabric (optional for base)
Step-by-Step Instructions
- 1. First things first, we need to talk about the blueprint. Just like when I was drafting financial models back in my analyst days, you can’t just wing it; you need a solid foundation. Grab a piece of paper and decide on your dimensions. I personally love a 4×8 foot bed because it’s easy to reach the center without stepping on your soil, which is crucial for maintaining soil structure. Make sure you pick a spot in your yard that gets at least six to eight hours of sunlight—your future basil and heirloom tomatoes will definitely thank you for it.
- 2. Next, let’s head to the hardware store to source your materials. Since we’re looking to balance our passion with long-term sustainability, I highly recommend investing in untreated cedar or redwood. These woods are naturally rot-resistant, meaning you won’t have to spend a fortune replacing your beds in two years. Avoid pressure-treated lumber if you’re planning on growing organic edibles, as you want to keep those chemicals far away from your dinner plate. Grab some heavy-duty galvanized screws too—they’ll hold everything together through the seasons.
- 3. Once you have your wood, it’s time for the assembly phase. This is where the “construction” meets the “vision.” Lay your boards out on a flat surface and start screwing them together to form your rectangular frame. If you’re feeling a bit more ambitious, you can add internal corner posts—essentially 4×4 wooden stakes—to give the structure some extra structural integrity. It might feel a little daunting at first, but seeing that frame take shape is incredibly rewarding.
- 4. Now, before we add the “good stuff,” we need to protect the ground. I like to lay down a layer of corrugated cardboard at the bottom of the bed. This acts as a natural weed barrier that eventually decomposes, feeding the earth below. If you’re worried about burrowing pests like gophers, go ahead and staple some hardware cloth (a sturdy metal mesh) to the bottom of the frame. It’s a small upfront cost that saves you a massive headache later on.
- 5. This is my favorite part: the soil mix. Don’t just grab a bag of dirt from the backyard; that’s a recipe for poor drainage and unhappy plants. Think of this as your nutritional investment. I swear by a blend of one-third high-quality compost, one-third peat moss or coconut coir, and one-third vermiculite or perlite. This creates a fluffy, nutrient-dense environment that allows roots to thrive and makes your gardening experience feel much more professional.
- 6. Finally, it’s time to level things out and get ready for planting. Use a rake to smooth the surface of your new soil, making sure there are no large clumps or air pockets. Give the whole bed a light watering to settle the earth before you start tucking your seedlings into their new home. Looking at that fresh, dark soil, I can’t help but think about the delicious harvests that are just a few months away. You’ve built something tangible, and now the real magic begins!
Choosing the Best Wood for Raised Beds and Long Term Joy
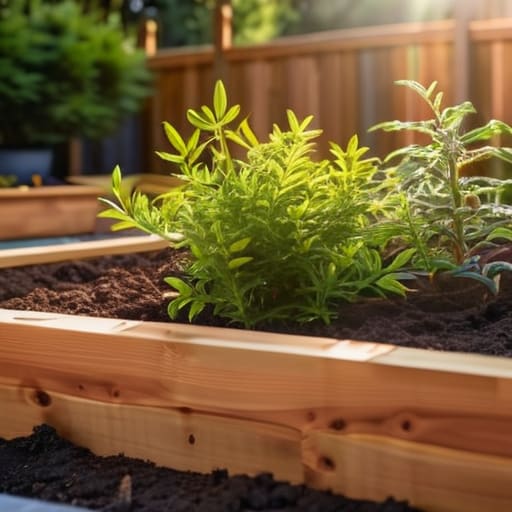
When I first started my transition from spreadsheets to soil, I made the classic mistake of choosing wood based solely on the cheapest price tag at the local hardware store. I quickly learned that in gardening, as in finance, your initial investment dictates your long-term yield. If you want your garden to be a source of joy rather than a weekend repair project, you really need to consider the cedar vs pressure treated lumber debate. While cedar is naturally rot-resistant and beautiful, it does come with a higher upfront cost. However, I like to look at it as a capital expenditure; it lasts much longer, meaning you won’t be spending your hard-earned money replacing boards every two seasons.
If you’re working with a tighter budget, just ensure you’re selecting high-quality, untreated timber to keep your growing environment safe. Regardless of your choice, remember that the wood is just the vessel for your culinary dreams. Once the frame is set, the real magic happens when you layer in a high-quality raised bed soil mix recipe to nourish those heirloom tomatoes we’re all dreaming of. Investing in the right materials now ensures your garden remains a sustainable sanctuary for years to come.
Perfecting Dimensions and Soil Mixes for a Life Well Fed

When you’re finally standing over your new structure, it’s easy to get swept up in the excitement, but don’t forget that math is your best friend here. I used to think bigger was always better, but after a few seasons of trial and error, I’ve learned that optimal raised garden bed dimensions are key to your sanity. Aim for a width of no more than four feet; this allows you to reach the center from either side without stepping into the bed, which is crucial for preventing soil compaction. If you’re working with a smaller space, don’t be afraid to go a bit deeper—investing in height now means less back strain later as you harvest those beautiful heirloom tomatoes.
Once your frame is set, it’s time for the real magic: the dirt. Forget the heavy, dense dirt from your backyard; you want a customized raised bed soil mix recipe that breathes. I personally swear by a blend of one-third high-quality compost, one-third peat moss or coconut coir, and one-third vermiculite. This ensures your plants have the drainage they need while retaining enough moisture to keep them thriving. Think of it as a high-yield investment—the better the foundation, the more delicious the “dividends” will be at dinner time!
Small Tweaks for Big Returns: My Pro-Tips for Garden Success
- Don’t forget to line your beds with cardboard! It’s a budget-friendly way to suppress weeds naturally while eventually breaking down into nutrient-rich compost for your soil.
- Think about your reach before you build. There is nothing more frustrating than having to lean awkwardly over a wide bed to harvest your herbs; keep them narrow enough so you can reach the center without straining your back.
- Invest in a good quality hardware cloth for the bottom of your beds. It’s a small upfront cost that prevents hungry gophers and moles from turning your hard work into an expensive buffet.
- Plan your sunlight exposure like you would a financial forecast. You wouldn’t invest in a stock without looking at the trends, so don’t plant sun-loving tomatoes in a spot that gets shaded by the neighbor’s oak tree by 2 PM.
- Leave room for growth—both for your plants and your passion. Start with one or two beds to master the rhythm of gardening before scaling up, ensuring you don’t overextend your time or your budget.
Cultivating Your Success: Final Thoughts for Your Garden Journey
Think of your raised bed as a long-term investment; choosing high-quality, rot-resistant wood might cost a bit more upfront, but it saves you from the “depreciation” of rebuilding every single season.
Don’t skimp on the soil mix—just like a solid financial foundation, your garden’s success depends entirely on the quality of what lies beneath the surface.
Start with dimensions that feel manageable so you don’t burn out; the goal is to create a sustainable rhythm that feeds both your soul and your kitchen table without feeling like a chore.
Investing in Your Own Harvest
“Think of building a raised garden bed as more than just a weekend DIY project; it’s a strategic investment in your well-being. Much like diversifying a portfolio, you’re creating a sustainable system that yields high returns in flavor, joy, and a direct connection to the food that fuels your life.”
Rachel Anderson
Cultivating Your Own Patch of Paradise
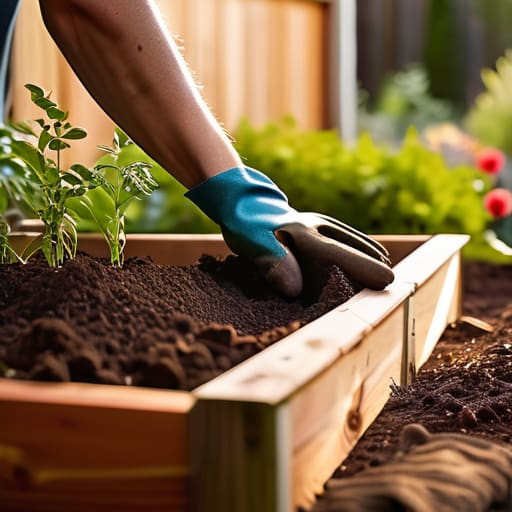
As we wrap up this build, I hope you feel as ready as I did to get your hands a little dirty. We’ve covered everything from selecting the right wood to ensure your investment lasts for years, to mastering those soil dimensions that act as the foundation for your future harvests. Remember, building a raised bed isn’t just about the construction; it’s about setting up a sustainable system where your time and resources are used efficiently. By choosing quality materials and the right nutrient-dense soil mix, you aren’t just gardening—you are investing in your own kitchen’s supply chain and ensuring that every dollar spent translates into something delicious and homegrown.
At the end of the day, whether you are a former numbers person like me or someone looking for a creative outlet, this garden is a testament to the idea that we can build the lives we want from the ground up. There is something incredibly grounding about watching a tiny seed transform into a vibrant ingredient for your dinner table. Don’t let the fear of a little trial and error hold you back; even the most seasoned chefs had to learn their way around a kitchen, and every gardener learns through the seasons. Go ahead and plant that first seed with confidence, knowing that you are nurturing both your body and your soul.
Frequently Asked Questions
How much should I realistically budget for this project if I want to balance quality materials with financial prudence?
Let’s talk numbers, because as a former analyst, I know that passion shouldn’t mean financial recklessness. For a standard 4×8 bed, I’d budget between $150 and $300. You can save by sourcing untreated cedar scraps or using local compost, but don’t skimp on the soil—that’s your primary investment in future flavor! Think of it as a capital expenditure for your kitchen; spending a little more on quality wood now prevents costly replacements later.
Are there any specific pest control strategies I should implement right away to protect my investment and my future harvests?
Protecting your garden is a lot like managing a startup—you have to be proactive rather than reactive! To protect your investment, I’d start with physical barriers like floating row covers; they’re a lifesaver against cabbage moths. I also swear by companion planting—tucking marigolds or basil near your veggies acts as a natural deterrent. It’s much easier (and cheaper!) to prevent a pest takeover now than to try and fix a depleted harvest later.
If I’m working with limited space in an urban setting, can I still make this work with smaller, more manageable raised beds?
Oh, absolutely! Honestly, coming from the city, I used to think you needed a sprawling backyard to be a “real” gardener. You don’t. Whether it’s a tiny balcony or a small patio, smaller beds are actually a fantastic way to manage your “investment” without getting overwhelmed. Think of them as micro-economies of flavor! Just focus on high-yield herbs or greens; they thrive in compact spaces and offer the most culinary bang for your buck.
